How to Prepare Your Garage for an EV Charger in Fountain Valley
A garage in Fountain Valley is usually the easiest place in the house to charge an electric car, but a bare wall and a parked car are not the same as a charging-ready garage. Knowing how to prepare your garage for an EV charger before the electrician arrives can shorten the install, lower the cost, and spare you from moving the unit a year later. Most homes here are single-family with an attached garage, often within a short walk of Mile Square Park, and that layout gives you real choices about where the charger goes and how the wiring reaches it. This guide walks through each decision, from the panel to the parking spot, so your Level 2 charger installation goes in clean the first time.
Start at the Electrical Panel, Not the Parking Spot
The single biggest factor in a garage EV charger project is how far the charger will sit from your electrical panel. The shorter and simpler that run, the less wire, conduit, and labor the job needs, so locate your panel first and treat it as the anchor point. In many Fountain Valley garages the main panel is already mounted on a garage wall, which is close to ideal; in others it sits on an exterior wall or in a hallway, and the charger run has to reach it. While you are there, read the panel's main breaker rating and count the open slots, because a Level 2 charger needs its own double-pole breaker. If the panel is full or already near capacity, the project may need an electrical panel upgrade for EV charging before any charger goes on the wall, and finding that out now rather than on install day keeps the schedule and the budget intact.
Choose Where the Charger Mounts
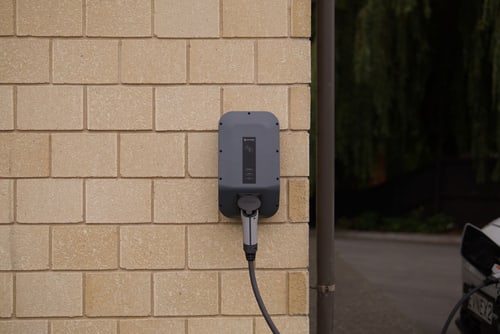
Where the charger mounts comes down to your car's charge port and the cable's reach. Park the way you normally would, note which side the port is on (front, rear, or fender), and picture the cable arcing to it without stretching across the hood or dragging on the floor. Charger cables commonly run about 18 to 25 feet, which is generous, but a unit mounted on the wrong wall still forces an awkward reach. Mount the charger roughly chest height, around 48 inches, so the connector is easy to grab and the cable hangs clear of the ground. Tesla notes that its Wall Connector is designed for indoor or outdoor mounting, and most home units are the same, so a side wall, the back wall, or an exterior wall near the driveway can all work. Leave a clear space around the unit for the connector holster and the cable loop, and keep it away from where a car door or bumper could hit it.
Decide Between a Plug-In Outlet and a Hardwired Charger
Deciding between a plug-in outlet and a hardwired charger shapes the whole install, so settle it before the wire goes in. A plug-in setup puts a 240-volt outlet on the wall, usually a NEMA 14-50 outlet, and the charger plugs into it, which makes the unit easy to swap or take with you. A hardwired charger is wired directly into the circuit with no outlet, which many manufacturers recommend for the highest power levels and for outdoor spots. ChargePoint, for example, offers its Home Flex as a hardwired unit delivering up to 50 amps and as plug-in versions for a NEMA 14-50 or 6-50 outlet that deliver up to 40 amps. The practical trade-off: a plug-in is flexible and simple to service, while a hardwired installation supports more amperage and is cleaner on an exposed wall. Knowing which one you want tells the electrician what to run and what breaker to set.
Match the Charger's Power to Your Panel and Your Driving
How many amps your charger draws should match both your panel's headroom and how much you actually drive. ENERGY STAR notes that a Level 2 charger adds roughly 10 to 20 miles of range per hour, and that units wired to a 50-amp circuit charge even faster. For most Fountain Valley commutes, a 40-amp charger refills a daily drive several times over during a single overnight session, so the highest amperage is not always necessary. Pulling less power also means a smaller circuit and, often, no panel upgrade. Chargers like Tesla's Wall Connector can be set to a range of breaker sizes to fit the electrical system you already have, which is useful when the panel is tight. Deciding your target amperage early lets the electrician size the breaker and wire correctly and tells you whether the existing panel can carry the load.
Size the Circuit and Plan the Conduit Run
A Level 2 charger needs its own dedicated 240-volt circuit, not a shared one, and planning that circuit is the heart of preparing the garage. The U.S. Department of Energy's Alternative Fuels Data Center explains that Level 2 equipment runs on 240 volts and that a qualified electrician can add the circuits needed to support it, with permits sometimes required from the local building authority. In Fountain Valley that means a city electrical permit and an inspection for the new circuit. The breaker size follows the charger: a unit set for 40 amps typically sits on a 50-amp breaker, since continuous loads are wired at 125 percent. Walk the path the wire will take from the panel to the charger location and note anything in the way: studs, a finished wall, an attic crossing, or a stretch of exterior wall. A short run along an open garage wall is simple; a long run through finished space or underground to a detached spot is more work, and spotting that early keeps the quote accurate.
Weatherproof the Spot, Especially Near the Door
If the charger or its outlet will see any weather, it has to be rated for it. A garage interior is usually dry, but an outlet near an open garage door, on an exterior wall, or in a carport is exposed to Orange County's coastal damp and the occasional driving rain, so the equipment and enclosure need an outdoor, weather-resistant rating. Outdoor 240-volt receptacles also require ground-fault protection, typically a GFCI breaker, which protects against shock in a wet location. Many charging units are built for this: a weatherproof housing lets the same model go inside or outside. The safest approach in a Fountain Valley garage is to keep the charger on an interior wall when you can, and when the best spot is exposed, use an outdoor-rated unit, an in-use weatherproof outlet cover, and GFCI protection sized by the electrician. Settling this before the wire is run avoids tearing work out to add protection later.
Clear and Measure the Space Before Install Day
Clear the work area before the electrician arrives so the install is not slowed by shuffling boxes. Empty the wall where the charger will mount and the path to the panel, move shelving or cabinets that block either one, and give the crew room to set a ladder and run conduit. ENERGY STAR points out that EV owners ideally charge overnight in their driveway or garage and advises having a licensed electrician evaluate whether your home's wiring and outlets can support the charger, which is far easier when the area is open. Measure the distance from the panel to your chosen spot and the height where the unit will sit, and confirm the parking position actually leaves the cable room to reach the port. A charger installed at a solid, protected home base turns daily charging into something you barely think about, which is the whole point.
Nail Down the Panel, the Spot, and the Wiring First
If you get only three things right before install day, make them the panel, the mounting spot, and the outlet-versus-hardwire choice, because those three decide the wire length, the breaker, and whether your charger ends up where the cable actually reaches. Everything else, from weatherproofing to clearing the floor, follows from those calls. The piece most homeowners can't judge alone is the panel: whether it has the capacity and an open slot for a dedicated 240-volt circuit. If you're not sure yours does, that is the moment to bring in a licensed local electrician. The team at Fountain Valley EV Charger can check your panel, recommend the right spot, and handle the Level 2 installation or any panel upgrade the circuit needs, so the charger goes in once and stays put.
Not sure your panel can handle a dedicated 240-volt circuit? Have a licensed Fountain Valley electrician check it and map the cleanest run before you buy a charger.
Instant QuoteGet Your Fountain Valley Garage Charger Done Right
We handle permitted Level 2 charger installs and panel upgrades across Fountain Valley, sizing the circuit and mounting the unit so it fits your garage and your car.